 SAMOURAÏ COOP
Checklist: preparing a professional video production
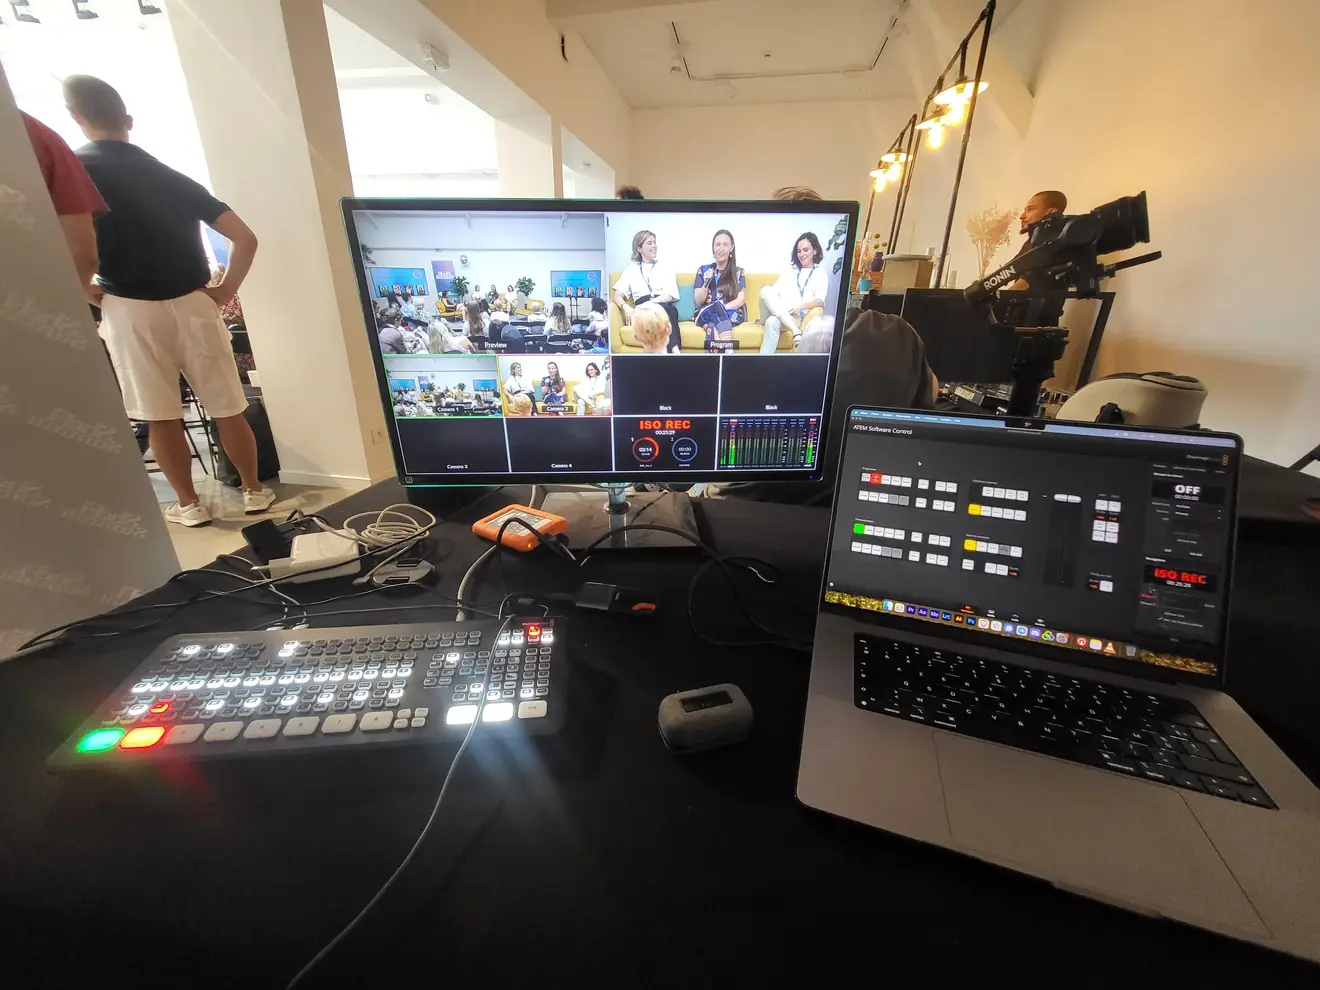
Creating a professional video without preparation means risking costly mistakes and delays. Good organization guarantees a smooth shoot and a quality result. Here are the key steps in summary:
- Define your goals and your audience: What is the purpose of the video? Who is it for?
- Develop a script and a storyboard: Plan every detail for clear, visual storytelling.
- Set a budget and a schedule: Allow a 10-15% margin for the unexpected.
- Location scouting and permits: Choose suitable locations and comply with the legal constraints.
- Equipment check: Cameras, mics, lighting, storage, power: everything must be ready.
- Post-production: Organize your files, edit the video and adapt the formats for each platform.
Each step, well executed, contributes to a successful project. Rigorous preparation is essential to avoid surprises and meet deadlines.
Complete professional video production checklist in 6 steps
Pre-production checklist
Define your goals and your audience
Before you start filming, it is crucial to define precisely what your video is for. Do you want to raise your brand’s visibility, explain a product, generate sales or simply entertain? Also identify your target audience: what is their age, their gender, their interests? In 2025, more than 70% of consumers say they prefer seeing “real people” or employees in brand videos rather than professional actors [3]. This preference for authenticity should shape the message you want to convey.
From the start, choose your distribution channels (TikTok, Instagram, website or connected TV) and write a one-page creative brief to make sure your whole team is aligned on your goals.
Write your script and create a storyboard
The script is the foundation of your storytelling. It should include the dialogue, the stage directions, the character descriptions and the overall concept. Write it in chronological order and favor natural language. A simple trick: read your text out loud. It lets you check that it sounds like a flowing conversation and not like an overly technical or rigid speech. For a short video (under 5 minutes), a 1 to 2 page script is enough.
The storyboard, in turn, brings your script to life by translating it into images. It is made up of drawings or panels that break the action down into individual shots. Each frame indicates the camera angles, the dialogue and the transitions. If you can’t draw, don’t panic: use photos or screenshots to illustrate your ideas. Start with a wide shot to establish the location, then move in progressively. This process will let you build a clear list of the shots needed for the shoot.
Set your budget and your schedule
Build a realistic budget that takes every aspect into account: talent, rentals, equipment, post-production, and allow a 10 to 15% margin for the unexpected. Then spread the costs in a balanced way.
For the schedule, work backwards from the planned delivery date. Set key milestones for each phase of the project and include 20% extra time to absorb the unexpected. For example, if your final edit has to be ready on the 31st, plan to finish it on the 25th so you have time to work in any last-minute corrections. For a short video, the pre-production phase generally takes up to two weeks.
Once the budget and the schedule are in place, move on to the next step: location scouting and the necessary permits.
Find locations and obtain permits
Choose your filming locations for their look and their practicality, while making sure you meet the legal requirements. Book locations and talent well in advance to avoid unpleasant surprises. Identify potential constraints early, such as access, power sources or ambient noise, and plan the setup and teardown of the equipment carefully.
Don’t forget to take external factors into account, such as team availability, travel time between sites and weather conditions. For complex shoots, draw up a detailed schedule including time for setup, makeup, lunch breaks and teardown. Rigorous organization will turn a stressful shoot into a smooth, controlled experience.
5 STEPS to properly prepare a PRO SHOOT
Equipment and supplies checklist
To keep the production running without a hitch, it is essential to check your equipment and your digital tools carefully. This technical step, which extends the planning phase, will help you avoid costly surprises on the day of the shoot.
Check cameras, lenses and accessories
Go for a camera with a large sensor (ideal for low-light conditions), a high bit depth and a resolution of at least 4K [6]. Several options are available depending on your budget: the Blackmagic Pocket Cinema Camera at €1,295 is ideal for modest productions, while the Blackmagic URSA Mini Pro (€5,995) or the Canon EOS C200B (€5,999) suit more ambitious projects [7].
For lenses, make sure they are compatible with your mount (EF, PL, B4, F or MFT) and plan at minimum a wide-angle for interior shots and a zoom for extra flexibility [6] [7]. Don’t forget to include stabilization systems such as fluid-head tripods, gimbals or sliders depending on the movements you have in mind [6].
Audio deserves as much attention as the image: use lavalier mics for interviews, directional mics to capture precise sound, and wireless systems for more mobility [6]. On the lighting side, favor LED panels combined with softboxes and reflectors for a soft, evenly spread light [6]. Once this part is checked, focus on storage and power.
Organize storage and power
Make sure all your batteries are charged and keep spare batteries for every device (cameras, wireless mics, monitors, lights). Also prepare several memory cards (SD, CFast 2.0 or UHS-II) and format them before the shoot [2] [4]. If your camera allows it, enable dual-slot recording for extra safety. Every evening, back up your footage to an external hard drive to avoid any data loss [4].
Once power and storage are secured, move on to preparing the digital tools.
Prepare software and digital tools
Use standardized templates for your storyboards, budgets and schedules, which will save you precious time [5]. Production management software such as StudioBinder or Yamdu makes it easier to centralize schedules, call sheets, equipment lists and contacts [5].
For post-production, check that your software is compatible with your hardware and that all the necessary plugins are up to date [8]. Among the popular options, Adobe Premiere Pro (€19.97/month) integrates seamlessly with Creative Cloud, while DaVinci Resolve offers a capable free version or a Studio version at €295 for advanced color-correction features. For Mac users, Final Cut Pro X (€299) remains a reference [8]. Finally, set up your digital audio workstation (DAW) with tools such as Pro Tools or Adobe Audition for the sound mix [8].
“Make sure you have a backup camera, that you’ve always got extra batteries charged, and that content cards are formatted correctly.” Adam Watstein, Co-founder, Sharpshooter Pictures [5]
Shoot-day checklist
Shoot day is finally here, and everything is in place: the team, the equipment, and the ideas. But even with impeccable preparation, one last technical and organizational check is crucial for everything to run smoothly. Start with a group briefing of 15 to 20 minutes. This moment synchronizes the roles, the schedule and the safety instructions. It is also the opportunity to make sure everyone shares the same creative and technical vision before rolling the first take. Here are the key steps not to miss.
Check camera settings and framing
First of all, review your technical setup. Test every connection, format the memory cards directly in the camera, and set the resolution to at least 4K, now a professional standard. Go for a LOG profile if you want extra flexibility in post-production, or a standard profile for immediate but less malleable results. Use tools such as scopes and waveform monitors to adjust white balance, exposure and contrast.
For framing, follow the rule of thirds and vary the angles (wide, medium, tight) to enrich your options in the edit. If you are filming a person, place them slightly off-center, with their gaze directed toward the open space in the frame. Camera height is essential too: at eye level for a neutral effect, or at a slight low angle to strengthen their presence. Don’t forget to record 30 seconds of “room tone” (ambient sound) at every filming location. This sound is indispensable for covering silences or cuts in the edit.
Manage sound and lighting
Good lighting makes all the difference. Set up three-point lighting to bring out your subject and give the image depth. Avoid mixing light sources with different color temperatures, which could throw off the visual harmony. If distracting reflections appear, on glasses for example, adjust the height or the angle of the lights. In untreated spaces, blankets or cushions can help reduce echo and improve the acoustics.
For sound, never drop your guard. A team member must constantly monitor the audio levels with headphones, ready to catch any clipping or stray noise. Identify and eliminate unwanted noises such as loud ventilation, outside traffic or background conversations. Record the audio at 24-bit / 48 kHz to guarantee optimal quality and flexibility during the mix.
Once image and sound are under control, focus on the human organization.
Coordinate talent and crew
Before filming, take the time to talk with your talent to put them at ease. A relaxed approach will help them forget the camera is there. Rather than a rigid script, give them key points in list form. This encourages natural speech, at an average rate of 150 words per minute. Organize your schedule in blocks of one hour at most, with breaks and margins to handle the unexpected.
For smooth communication on set, use tools such as WhatsApp for instant updates or Trello to share briefs and track progress. Appoint someone in charge of continuity: this person will note the positions of actors, props and takes, guaranteeing perfect consistency in the edit. Finally, don’t neglect the crew’s comfort. Plan a rest area and proper meals. A well-fed, well-rested crew is far more effective. And remember: always keep backup batteries and memory cards within reach. When it comes to equipment, better over-prepared than under-prepared!
Post-production checklist
Once the shoot is over, it is time to turn your footage into a captivating story. As Jim Donnelly of Massive.io sums it up perfectly:
“Post-production is where your beautiful footage is transformed into a singular narrative that looks good, sounds great, and tugs at various emotional heartstrings” [9].
To avoid wasted time and maximize efficiency, start with rigorous organization before diving into the edit.
Organize and import your media
Organization is essential. Apply the 3-2-1 rule: every file must be saved in three different places (main drive, local backup and cloud or external storage). Schofield’s law illustrates well why this method matters:
“Schofield’s Second Law of Computing states that if a file doesn’t exist in three places, it doesn’t exist” [9].
For active storage, choose reliable solutions such as a RAID system. For collaborative work, a NAS is ideal, while external SSDs are perfectly suited to large files.
Adopt a standardized naming convention following the ISO 8601 standard (YYYY-MM-DD) so files sort automatically by date. Organize your folders by scene, sequence or media type (footage, audio, graphics). In parallel, ask the director of photography for a shoot report including the “circled” takes so you can quickly identify the best segments.
For high-resolution projects (4K or 8K), create proxies by converting your footage into lighter versions (formats such as ProRes or DNxHD). This allows smooth editing while keeping the original files for the final export. Also synchronize the external audio tracks with your video from the start to avoid any drift.
Once your files are ready, move on to assembling your story.
Edit and enhance the video
Editing generally unfolds in three stages:
- Rough cut: lay down the narrative structure and fix continuity errors.
- Fine cut: adjust every shot, add transitions and work up to “picture lock”.
- Finishing: apply color correction and grading to set the visual mood.
On the audio side, make sure you balance the levels, remove stray noise and bring in music and sound effects. Have the edit reviewed by a team member not involved in the day-to-day process for an objective quality check.
When your edit is final, prepare your files for distribution.
Finalize and export the deliverables
Adapt your exports to the specifications of the different platforms: horizontal format for YouTube, vertical for Stories, square for Instagram. Check the technical parameters such as resolution, aspect ratio, frame rate and bitrate. Also add titles, credits and subtitles for a complete experience.
For a theatrical screening or a festival, export your video as a DCP (Digital Cinema Package), which bundles encrypted video, audio and metadata files. Include a call to action (CTA) to encourage viewers to take the next step.
Finally, archive your source files and projects carefully. This will make any future edits or re-exports easier.
Using decentralized tools for production
Once your deliverables are exported, why not go further and bring decentralized tools into your production process? These technologies offer more autonomy, stronger security and better collaboration for creative teams. Every production step aims to improve efficiency, and these decentralized solutions make your workflow even more solid. Let’s look at how they can concretely transform governance, storage and coordination within teams.
Decentralized governance for creative teams
Decentralized governance tools enable collaborative decision-making and transparent resource management. Samouraï Coop studies this directly: its Governance Research Lab works on how groups govern themselves — cooperatives, DAOs, open-source projects — and publishes a sourced glossary of the vocabulary. The studio has been building and promoting open-source culture since 2016, with more than 3.1 million views and 40 festival selections behind it [13]. Collective decision-making and professional standards are not in tension; the second is what the first is for.
To maximize efficiency in a decentralized production, it is essential to centralize information so that every team member can access the data, ask questions and share their view [10]. Real-time resource management guarantees total transparency and fluidity at every stage of the project.
Blockchain-based media storage
Decentralized storage protocols, such as IPFS, bring an innovative solution thanks to content addressing (CID). In plain terms, your files are validated by their content and not by their location, which reduces the risk of unauthorized changes and eliminates broken-link problems [12]. In 2025, seven versions of Kubo strengthened IPFS’s capacity, introducing tools such as DHT Provide Sweep and AutoTLS for better scalability [12].
To guarantee that your master files — or “digital negatives” — remain intact and verifiable throughout post-production, favor these decentralized protocols. Tools such as Helia and AutoTLS offer direct access to media through browsers, simplifying collaboration for creative teams while ensuring optimal security [12].
Coordinating teams through P2P models
Peer-to-peer (P2P) tools make it easier to share large files without going through centralized servers. For example, Skeem Drive offers a secure platform for transferring your documents and media [10] [11]. In addition, solutions such as Frame and Skeem let you leave precise, timestamped comments on different types of content, which improves real-time collaboration [10].
As Samouraï Coop puts it:
“In the future of the Internet, we believe everyone will be able to use P2P tools. We help the people who need to discover this world step by step, on the road to freedom” [13].
By adopting this approach, you reduce your dependence on third-party providers while speeding up file retrieval through mechanisms such as caching and active peer probing [12].
Conclusion
Careful preparation, combined with modern technological tools, is the key to a successful video. Preparing a professional video production is above all about laying solid foundations. As Online Optimism sums it up perfectly:
“Think of pre-production as the architect’s blueprint before building; without it, the construction would lack direction and structure” [4].
Every step, whether it is defining goals or finalizing the export, directly impacts the quality of the final result. Mistakes made at the start can quickly turn into costly delays and budget overruns [1].
Taking the time to prepare properly is not a waste of time but a strategic investment. The example of Dollar Shave Club shows how meticulous planning can outdo improvisation [2].
Decentralized tools, such as blockchain-based or P2P systems, bring a new dimension to this preparation. They secure your files, ease real-time collaboration and give your team greater autonomy. These technologies do not replace the fundamentals of production; they complement and reinforce them. By combining rigorous organization with modern technological solutions, you ensure a smooth, efficient production from start to finish.
To avoid surprises, apply one simple rule: add a 20% margin to every phase (travel, shooting, editing) [1]. This precaution lets you stay in control, even when things go sideways. In short, a successful professional video rests on exhaustive preparation and well-considered technology choices.
FAQs
Which digital tools are essential for successful video post-production?
Some digital tools are now indispensable for seeing a video post-production through. Adobe Premiere Pro remains a major reference for editing. It offers powerful features, such as proxy workflows, which make heavy files easier to manage while keeping processing smooth.
For visual effects and animation, Adobe After Effects is the ideal companion. Thanks to its integration with Premiere via Dynamic Link, it becomes easy to add animations and dynamic titles, or to apply color corrections without extra complicated steps.
Modern workflows also rely on remote collaboration tools and cloud sharing solutions. These options considerably simplify exchanges between team members, wherever they are. Finally, to transfer high-resolution files quickly and securely, specialized services offer reliable, high-performance transmission.
How do you choose a filming location while complying with the applicable rules?
Finding the perfect location for a shoot is not just about the look or the mood you are after. You also need to make sure you comply with the local rules. Here is how to proceed:
- Define your needs: Think about the location’s accessibility, how well it matches your script and your budget, which must include potential permit fees.
- Check the location’s status: For a public place, such as a street or a park, you will need a permit from the town hall or the prefecture. If you go for a private location, a written agreement from the owner is essential.
- Prepare a complete application: This file must detail your project, including the dates, times, budget, insurance information, description of the scenes and planned equipment. Submit it to the competent authority at least one week before the shoot.
Once the permit is in hand, follow the conditions it sets to the letter, whether that means the hours or the noise limits. A scouting visit beforehand is also an excellent idea to anticipate any obstacles on site.
What are the benefits of decentralized storage for a professional video production?
Decentralized storage has appealing strengths for video production professionals. Unlike a centralized system, where all the data is gathered in one place, this method spreads the files across several locations. This can strengthen data security, because the failure of a single server does not mean losing all the information.
Another notable advantage is improved file access for teams that are geographically dispersed or working across different time zones. This structure supports smoother, more responsive collaboration, a major asset in an industry where deadlines and coordination are essential.
For advice suited to your specific needs or tailor-made solutions, it is wise to consult experts or resources specialized in decentralized storage applied to video production.